Glass Dog Door Installation: A Complete Guide for All Glass Types
How to Install a Pet Door in Glass
Complete Guide to In-Glass Pet Door Installation
What's involved in installing a pet door into glass panels, sidelights, French doors, and fixed windows – including tempered glass replacement.
⏱️ Estimated Time: 2–5 Hours (glass fabrication lead time of 3-4 weeks) | 🔧 Difficulty: Professional Highly Recommended | 👤 People Needed: 2
Before You Begin
Installing a pet door in glass is the most elegant solution for pet access – the door integrates seamlessly into existing glass panels. However, this is also the most specialized installation type. The existing glass pane is removed and replaced with a new tempered glass unit that has the pet door factory-built into it. You cannot simply cut a hole in existing tempered glass – it will shatter. This is why in-glass installations require professional fabrication and installation.
📋 Things to Consider Before Installation
- Tempered Glass Cannot Be Cut: All exterior glass in doors and most windows is tempered safety glass. It cannot be drilled or cut after tempering – it will shatter into thousands of pieces. The solution is to order a new tempered glass panel with the pet door opening factory-cut (notched) before tempering.
- Glass Type: Identify your current glass: single-pane, insulated (dual-pane/IGU), Low-E coated, or laminated. The replacement glass should match or exceed the original's specifications.
- Glass Measurements: Precise measurements of the existing glass panel are critical. The replacement pane must fit the existing frame exactly. Even ⅛″ off can mean the glass won't fit. We first have you measure the overall visible glass, and after ordering we schedule our installers to visit your home for precise measurements.
- Lead Time: Custom tempered glass fabrication typically takes 2–3 weeks, while the pet door arrives within 3-5 business days. Once we have delivery estimates, we will schedule a time to come out within 24-48 hours to install the new glass and pet door. We recommend storing the original glass in a safe location, so it can be swapped out in the future (if you move or sell the home, we can restore it to the original condition).
- Cost: In-glass installations are more expensive than door-mount or patio panel options because of the custom glass fabrication and installation difficulty. Budget for the glass panel, plus the pet door unit, plus installation which can run anywhere from $1250 - $3500 depending on these variables.
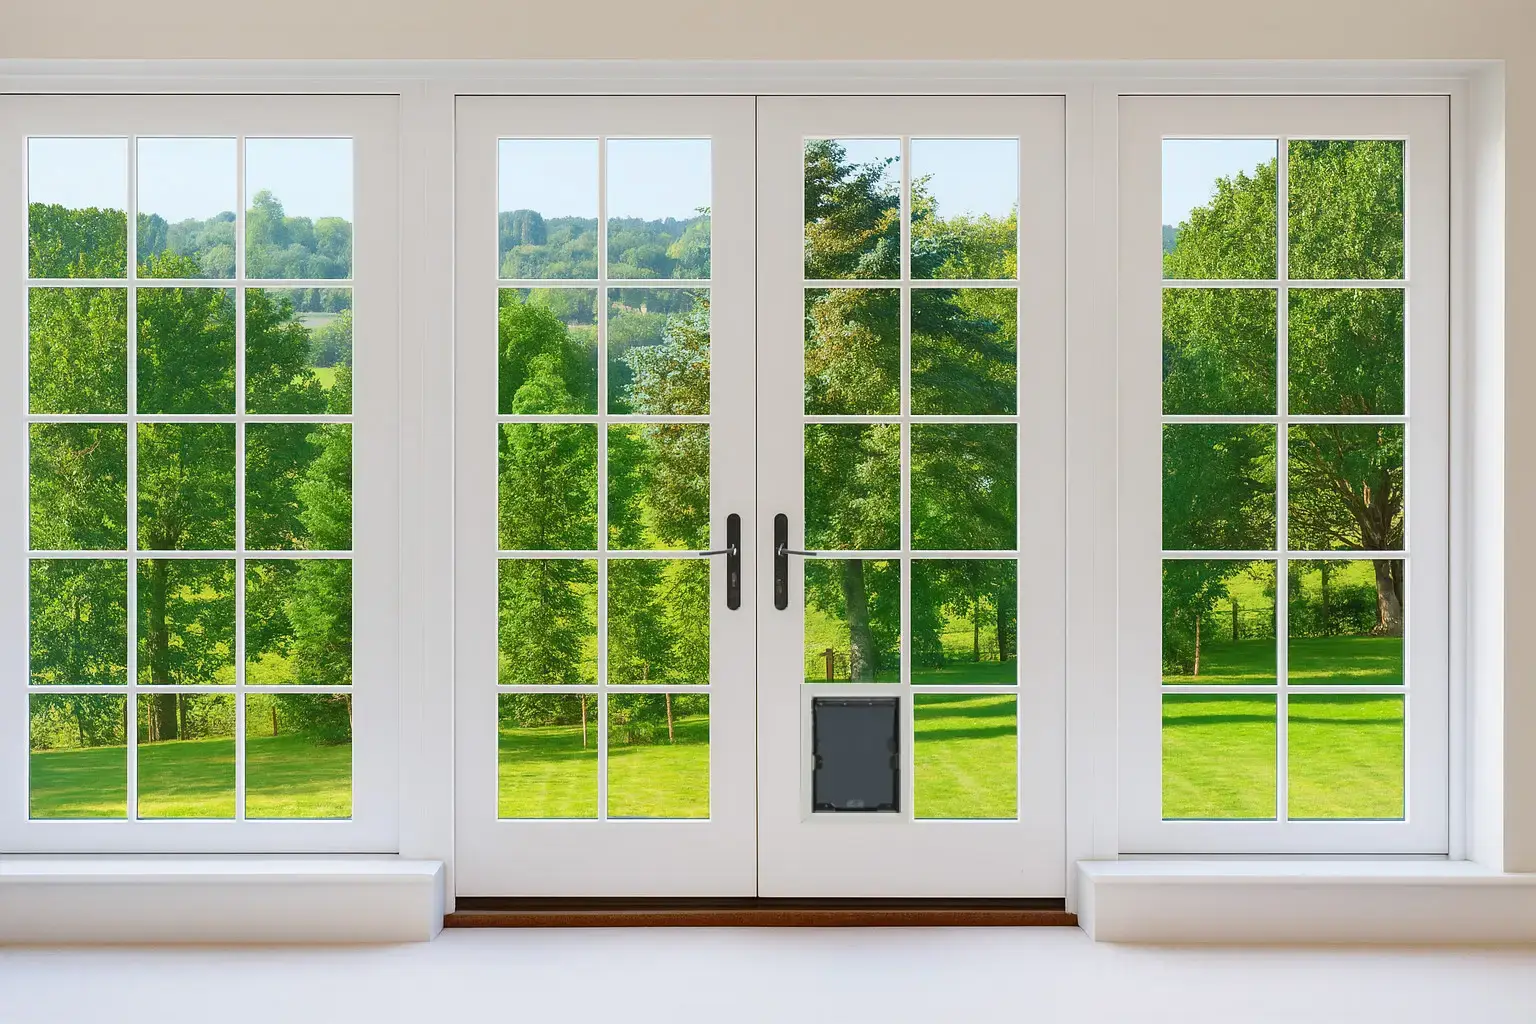
- French Doors: In-glass pet doors work beautifully in French doors. The glass panel in one door is replaced with the pet door glass unit, preserving the French door aesthetic.
- Sidelights: Narrow sidelight panels flanking your front door are excellent candidates for in-glass pet doors. The sidelight glass is replaced with a new piece of glass with a pet door.
- HOA & Appearance: In-glass installations are the most visually discreet option – often required by HOAs that restrict visible exterior modifications.
- DIY Feasibility: While removing and replacing a glass panel is possible for experienced DIYers, ordering the correct custom glass and handling large tempered panels carries significant risk. This is the one pet door type where professional installation is strongly recommended.
Tools & Materials You'll Need
🔧 Tools
|
📦 Materials
|
Step-by-Step Installation Process
Step 1: Measure the Existing Glass Panel
|
Precise measurements are the most critical part of this project:
|
Step 2: Measure Your Pet & Order the Glass Unit
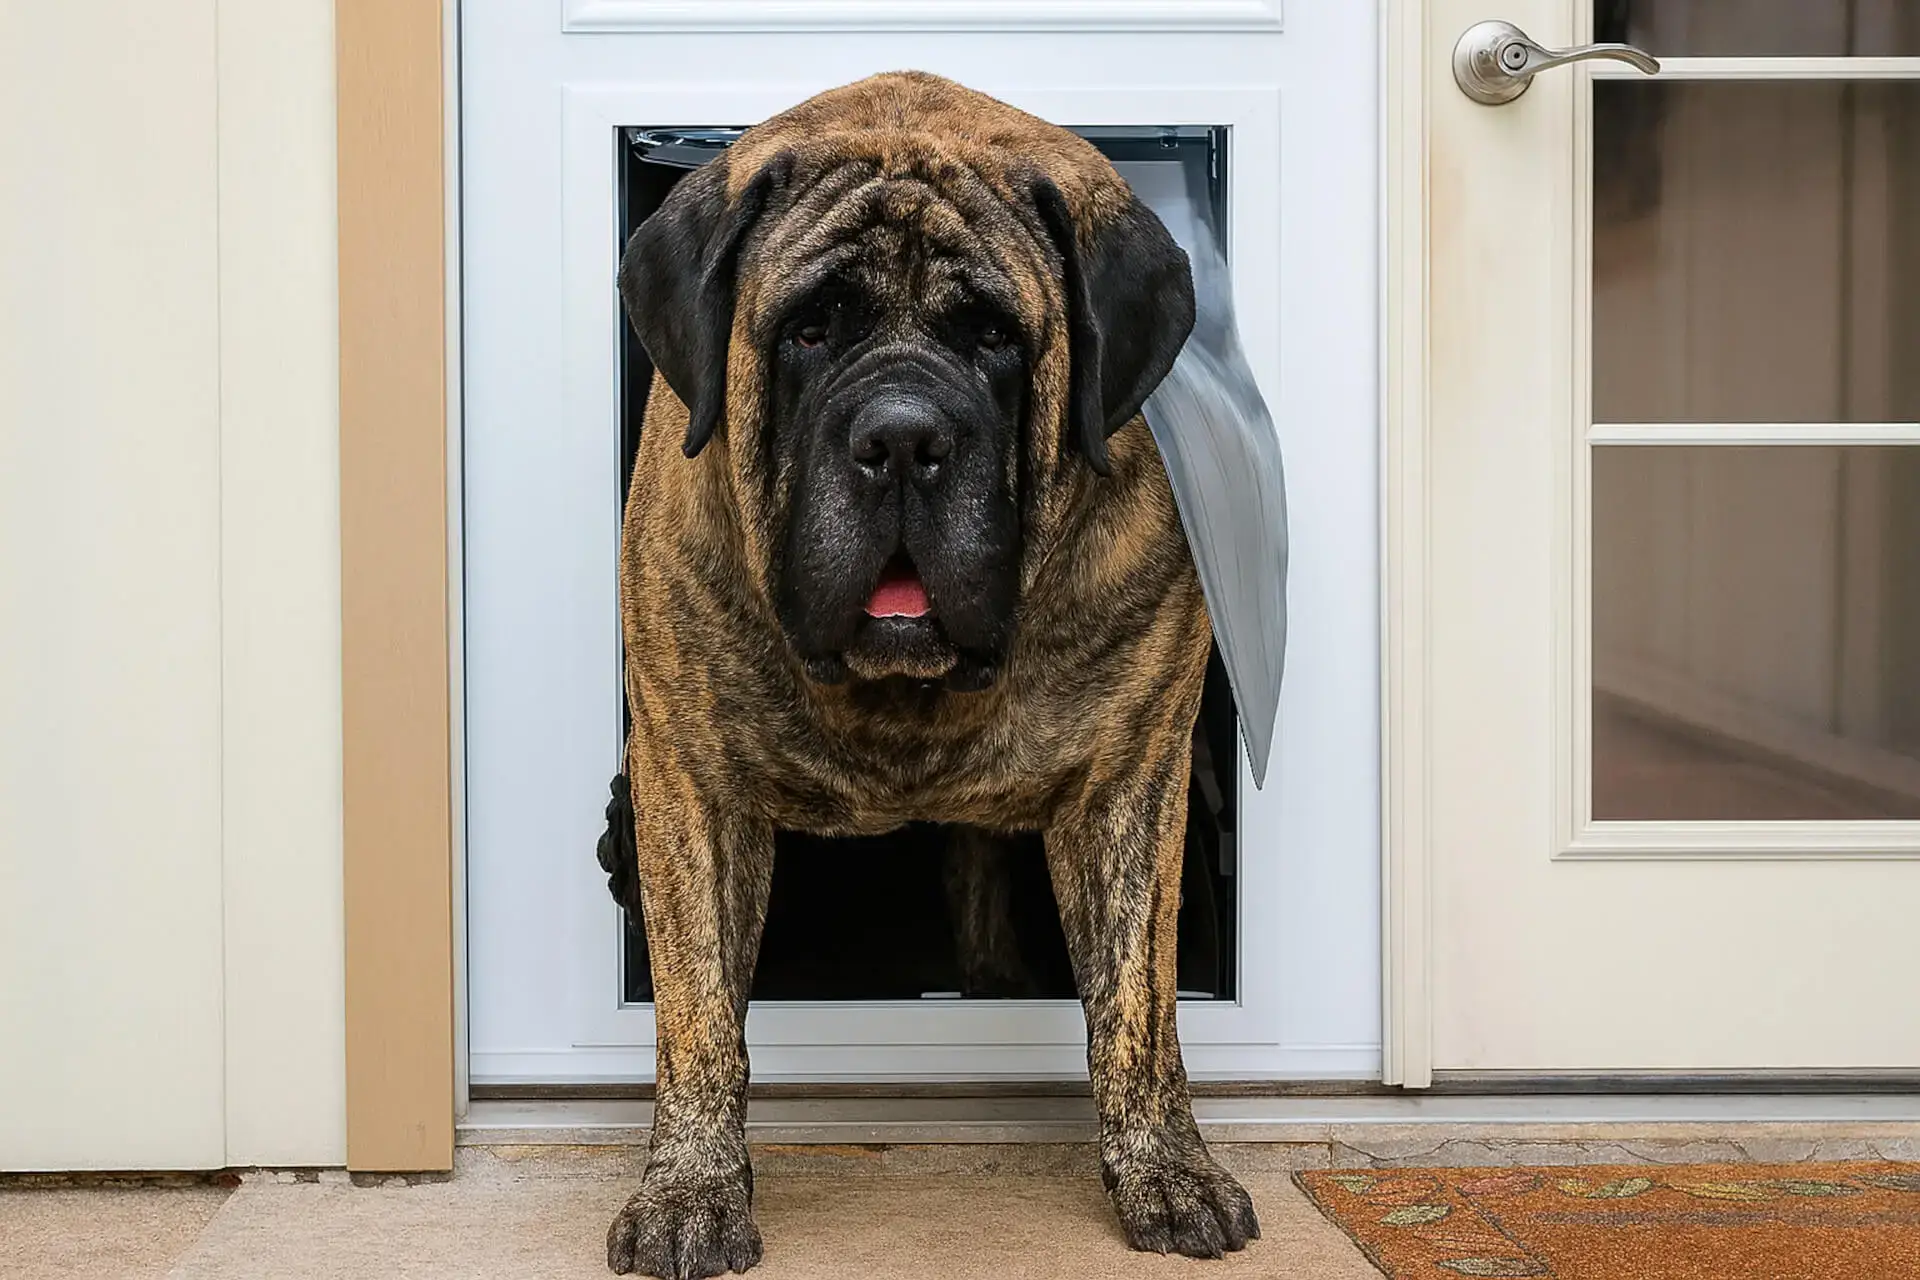
- Measure your pet's shoulder height (from floor to top of shoulders) and chest (or hip) width, whichever is widest! You can also open a door and call your pet through to see what it can comfortably walk through. We want to ensure your pet can step through the opening with at least 2" of shoulder height clearance, so they can simply duck their heads and walk through without rubbing against the top of the flap.
- Choose the pet door flap size that accommodates your largest pet's shoulder height and width.
- Specify the pet door position in the glass – either the bottom left or bottom right side, from inside looking out.
- Order the custom tempered glass panel from your flat glass manufacturer or a local glass fabrication shop. Provide your exact glass dimensions (visible glass and overall dimensions), thickness, glass type, and desired pet door size/position. We provide the notch requirements on our website for each in glass dog door model.
- Allow 2–3 weeks for fabrication. The pet door opening is notched into the glass before the tempering process.
Step 3: Remove the Existing Glass Panel
|
 |
Step 4: Prepare the Frame
- Clean the frame channel thoroughly. Remove all old glazing compound, caulk, and debris.
- Inspect the frame for rot (wood frames), corrosion (metal frames), or damage.
- Repair any frame damage before installing the new glass – the frame must be solid and true or it could cause issues down the road.
- Place setting blocks (rubber/neoprene shims) at the bottom of the frame channel. These support the glass weight and prevent glass-to-metal or glass-to-wood contact.
Step 5: Install the New Glass Panel with Pet Door
 |
|
Step 6: Secure the Glass in the Frame
- From the interior side, install glazing points every 8–12 inches around the perimeter to hold the glass in place.
- Apply glazing compound around the interior perimeter, pressing it into the gap between glass and frame. Smooth with a putty knife at a 45° angle for a clean bevel.
- Alternatively, reinstall the trim stops you removed earlier. Nail them back into position with finish nails, being careful not to tap against the glass.
- Apply a final bead of silicone caulk around the exterior perimeter where the glass meets the frame.
Step 7: Install the Pet Door Components
- Sleeve the interior and exterior pet door frames together into the glass notch, sandwiching the filler blocks (included) between the two frames. These HDPE filler blocks used to position the pet door appropriately, in relation to the door frame and glass.
- Insert screws through the interior of the two frames (in between the frames) to keep the frames together (creating a weatherproof seal).
- Apply caulk around the exterior perimeter of the pet door frame, to complete a weatherproof seal around the door.
- Insert the locking security panel.
- Test the flap for free swing and proper magnetic closure.
Step 8: Final Checks
- Clean all glass surfaces with glass cleaner.
- Check for any gaps or missed caulk joints around the frame.
- Verify the door (if applicable) still opens, closes, and locks properly.
- Test for air leaks by holding a lit match or incense near the glass edges on a windy day.
- Train your pet to use the new in-glass pet door with treats and patience.
💡 Tips & Tricks
- Order glass from the pet door manufacturer: Companies like Portal Pros offer complete glass + pet door kits with precise factory communication and integration. This eliminates measurement errors between varying glass specifications and pet door notches.
- Keep the old glass intact: If you ever want to remove the pet door, you can reinstall the original glass panel. Store it safely on edge (never flat) in a padded, protected area.
- Use two suction cups per person: Each person should use two suction cup lifters for maximum control when handling large glass panels.
- Work on a calm day: Wind gusts while handling a large glass panel are extremely dangerous. Choose a calm day for the glass swap.
- Insulated glass upgrade: If your current glass is single-pane, consider upgrading to a dual-pane (insulated) unit with the pet door. This improves energy efficiency significantly.
- Low-E coating placement: For insulated glass, specify that the Low-E coating goes on surface #2 (inside face of the outer pane) for heating climates or surface #3 (outside face of the inner pane) for cooling climates.
- Photograph the existing glass label: Most tempered glass has a small etched stamp with specifications. Photograph this before removal – it helps when ordering the replacement to ensure compatible glass is being installed.
⚠️ Common Mistakes to Avoid
- Trying to cut existing tempered glass: This is the #1 mistake. Tempered glass WILL shatter completely if you attempt to cut or drill it. The pet door opening must be cut before the glass is tempered at the factory. Annealed glass can be cut in circular shapes, but the Portal Pros does not offer any circular pet door models and annealed glass is dangerous to pets and humans, because when it breaks it will break in large shards that can be harmful.
- Inaccurate measurements: Even ⅛″ error can mean the replacement glass doesn't fit. Measure three times, order once.
- Handling glass solo: Large glass panels are heavy, awkward, and can break or cause serious injury if dropped. Always work with a helper.
- Skipping setting blocks: Glass resting directly on a frame channel will crack from pressure points and thermal expansion. Always use HDPE setting blocks.
- Mismatching glass specifications: Replacing insulated Low-E glass with single-pane clear glass reduces your home's energy efficiency and may violate building or HOA codes.
When to Call a Professional
In-glass pet door installation is the one category where professional installation is strongly recommended for most homeowners. Call a professional if:
- You're not experienced with glass removal and replacement
- The glass panel is large (over 3 feet in any dimension)
- The glass is insulated (dual-pane) or has specialty coatings
- You're unsure about the glass specifications needed for the replacement
- The frame is old, damaged, or uses a non-standard glazing system
- You want the warranty protection that comes with professional installation
Portal Pros is the nation's leading in-glass pet door installer.
📞 Call 855-DOG-DOOR for a free estimate.
🛒 Shop In-Glass Pet Doors • 📅 Book Professional Installation
Request a Free Glass Dog Door Installation Quote
Fill out the form below and a Portal Pros representative will get back to you promptly.